|
|
||
21-01-13 |
|
|
Please note that all of this is my personal option, and it may be a load of rubbish! Everyone who is into cars and motor sport wants more power from their engine. I would like to get 235bhp from my standard Sprint, but that is not going to happen. What works and what doesn't? I have read lots of different power figures that have been quoted for the Sprint lump, these being :
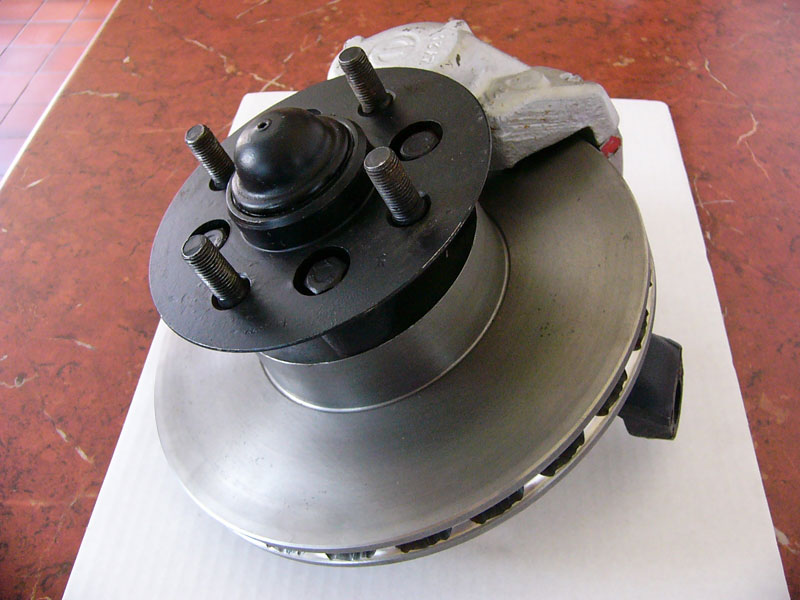
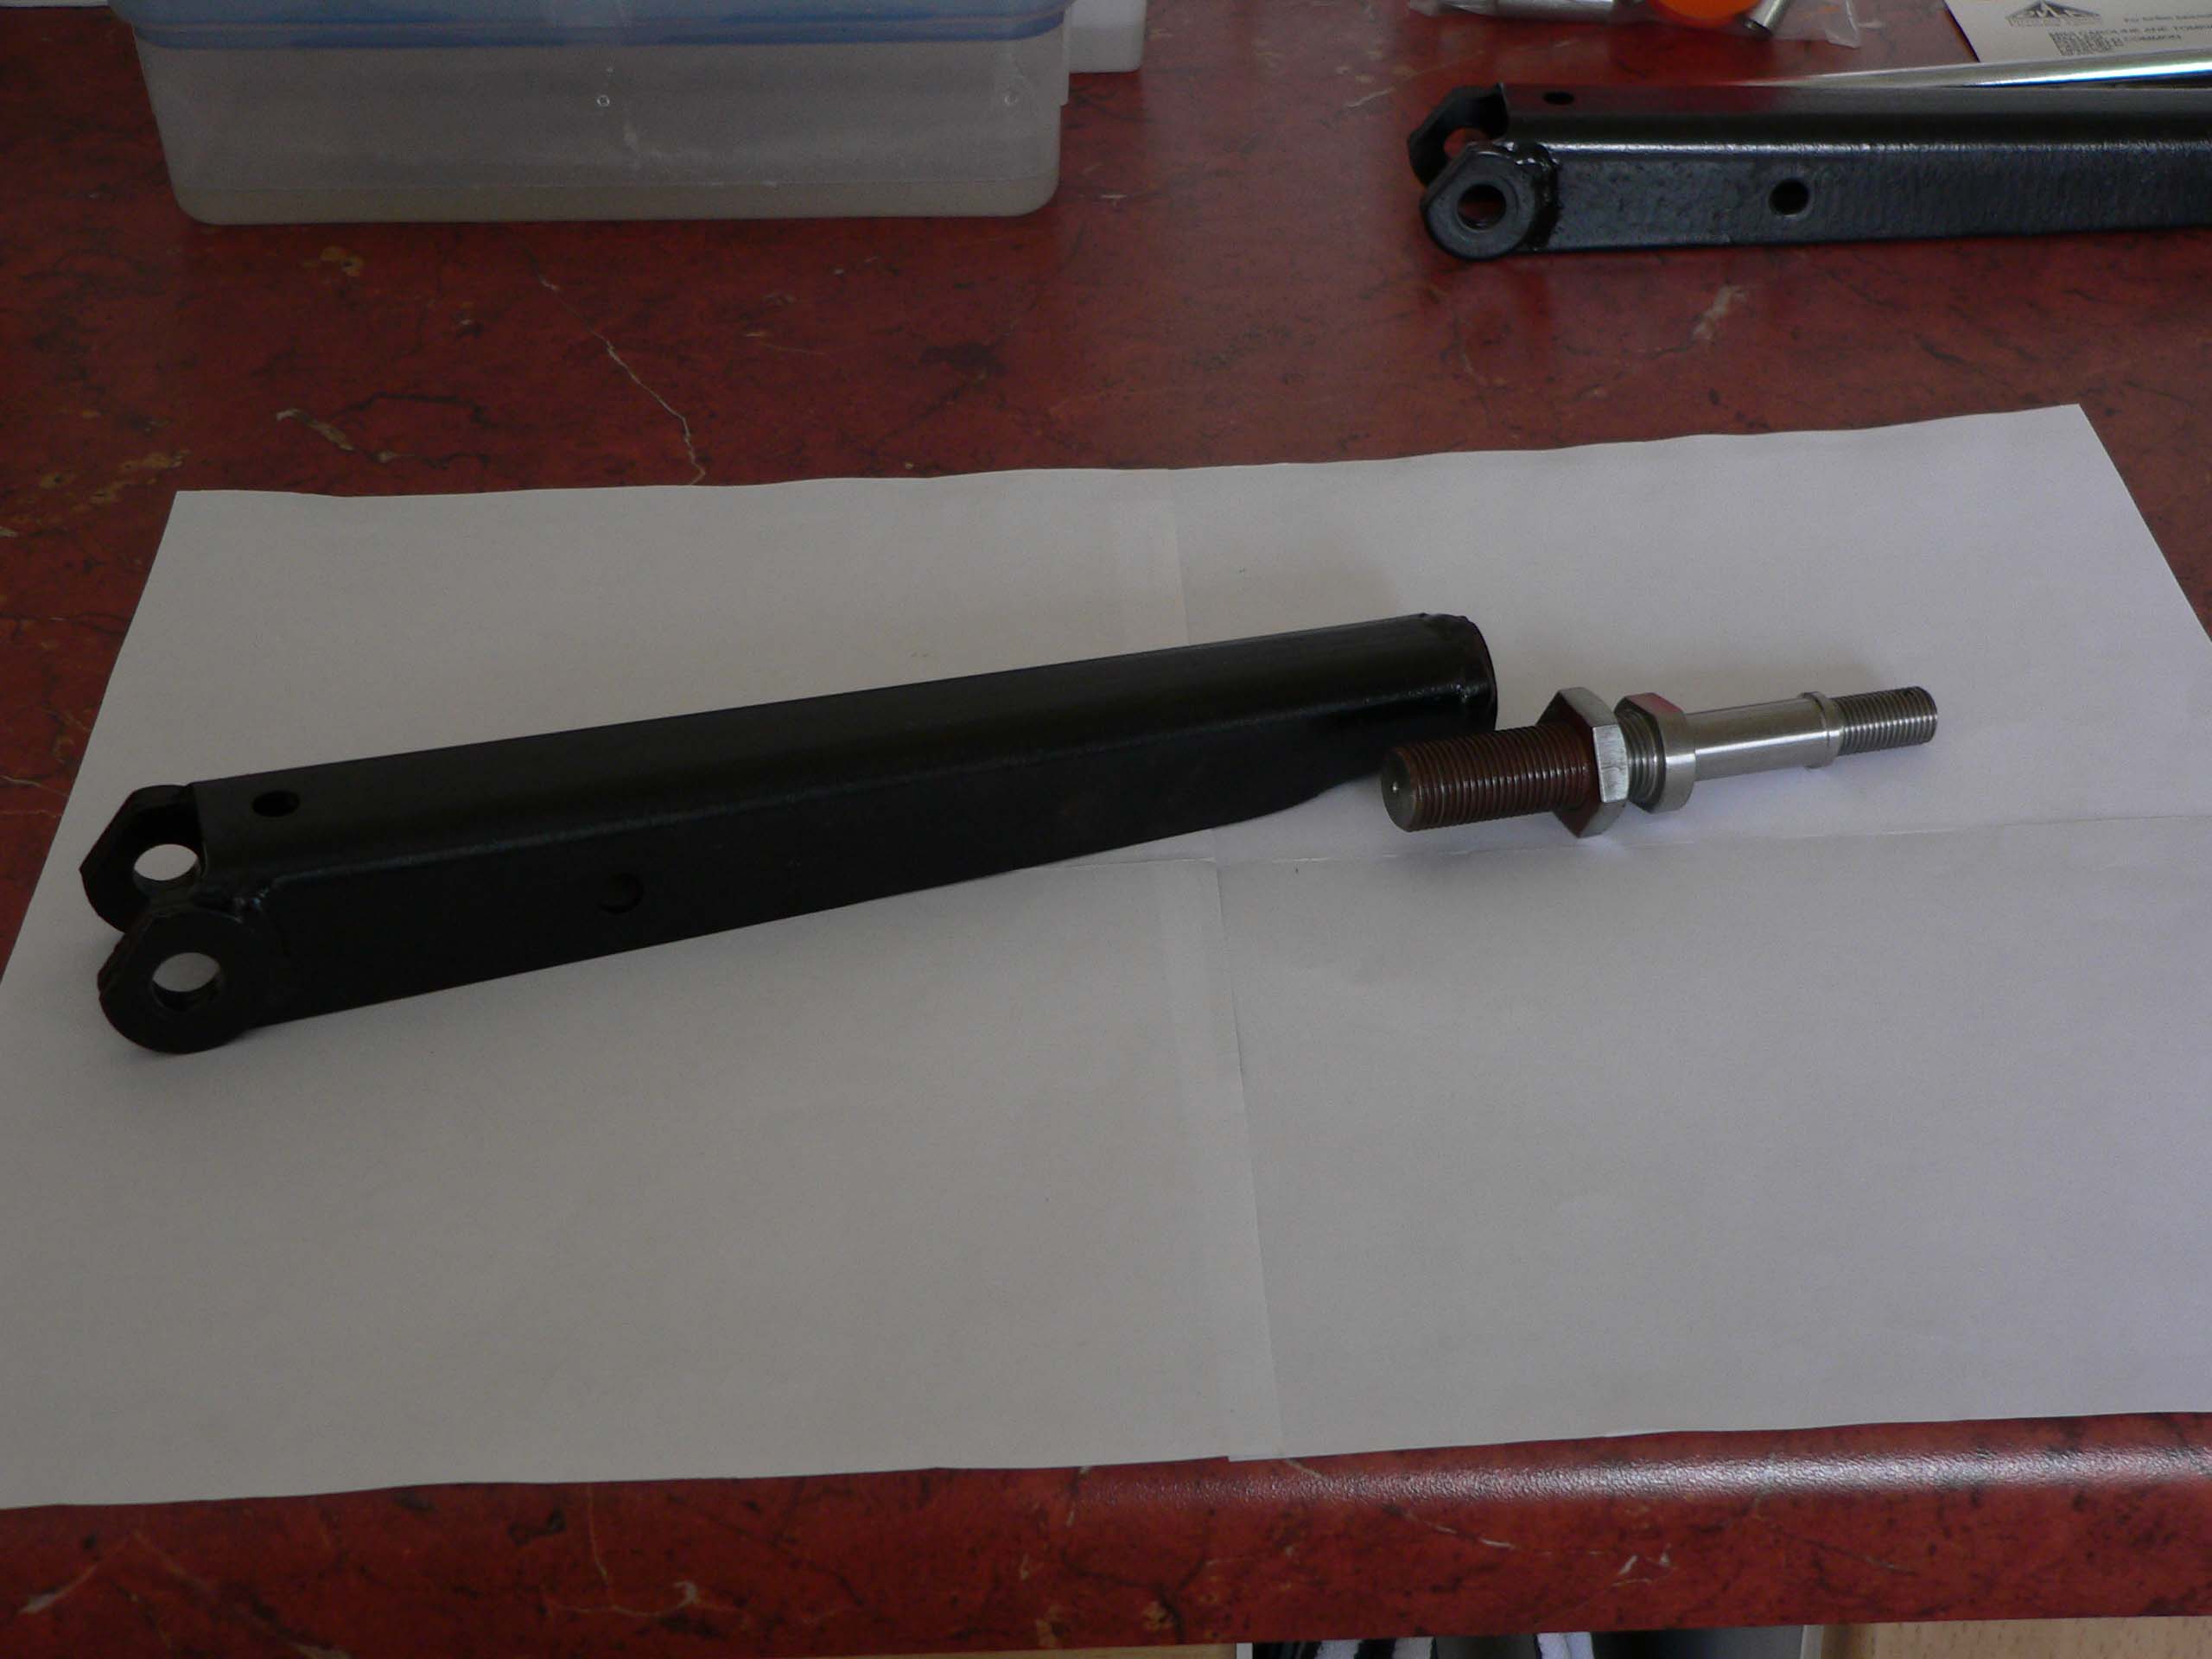
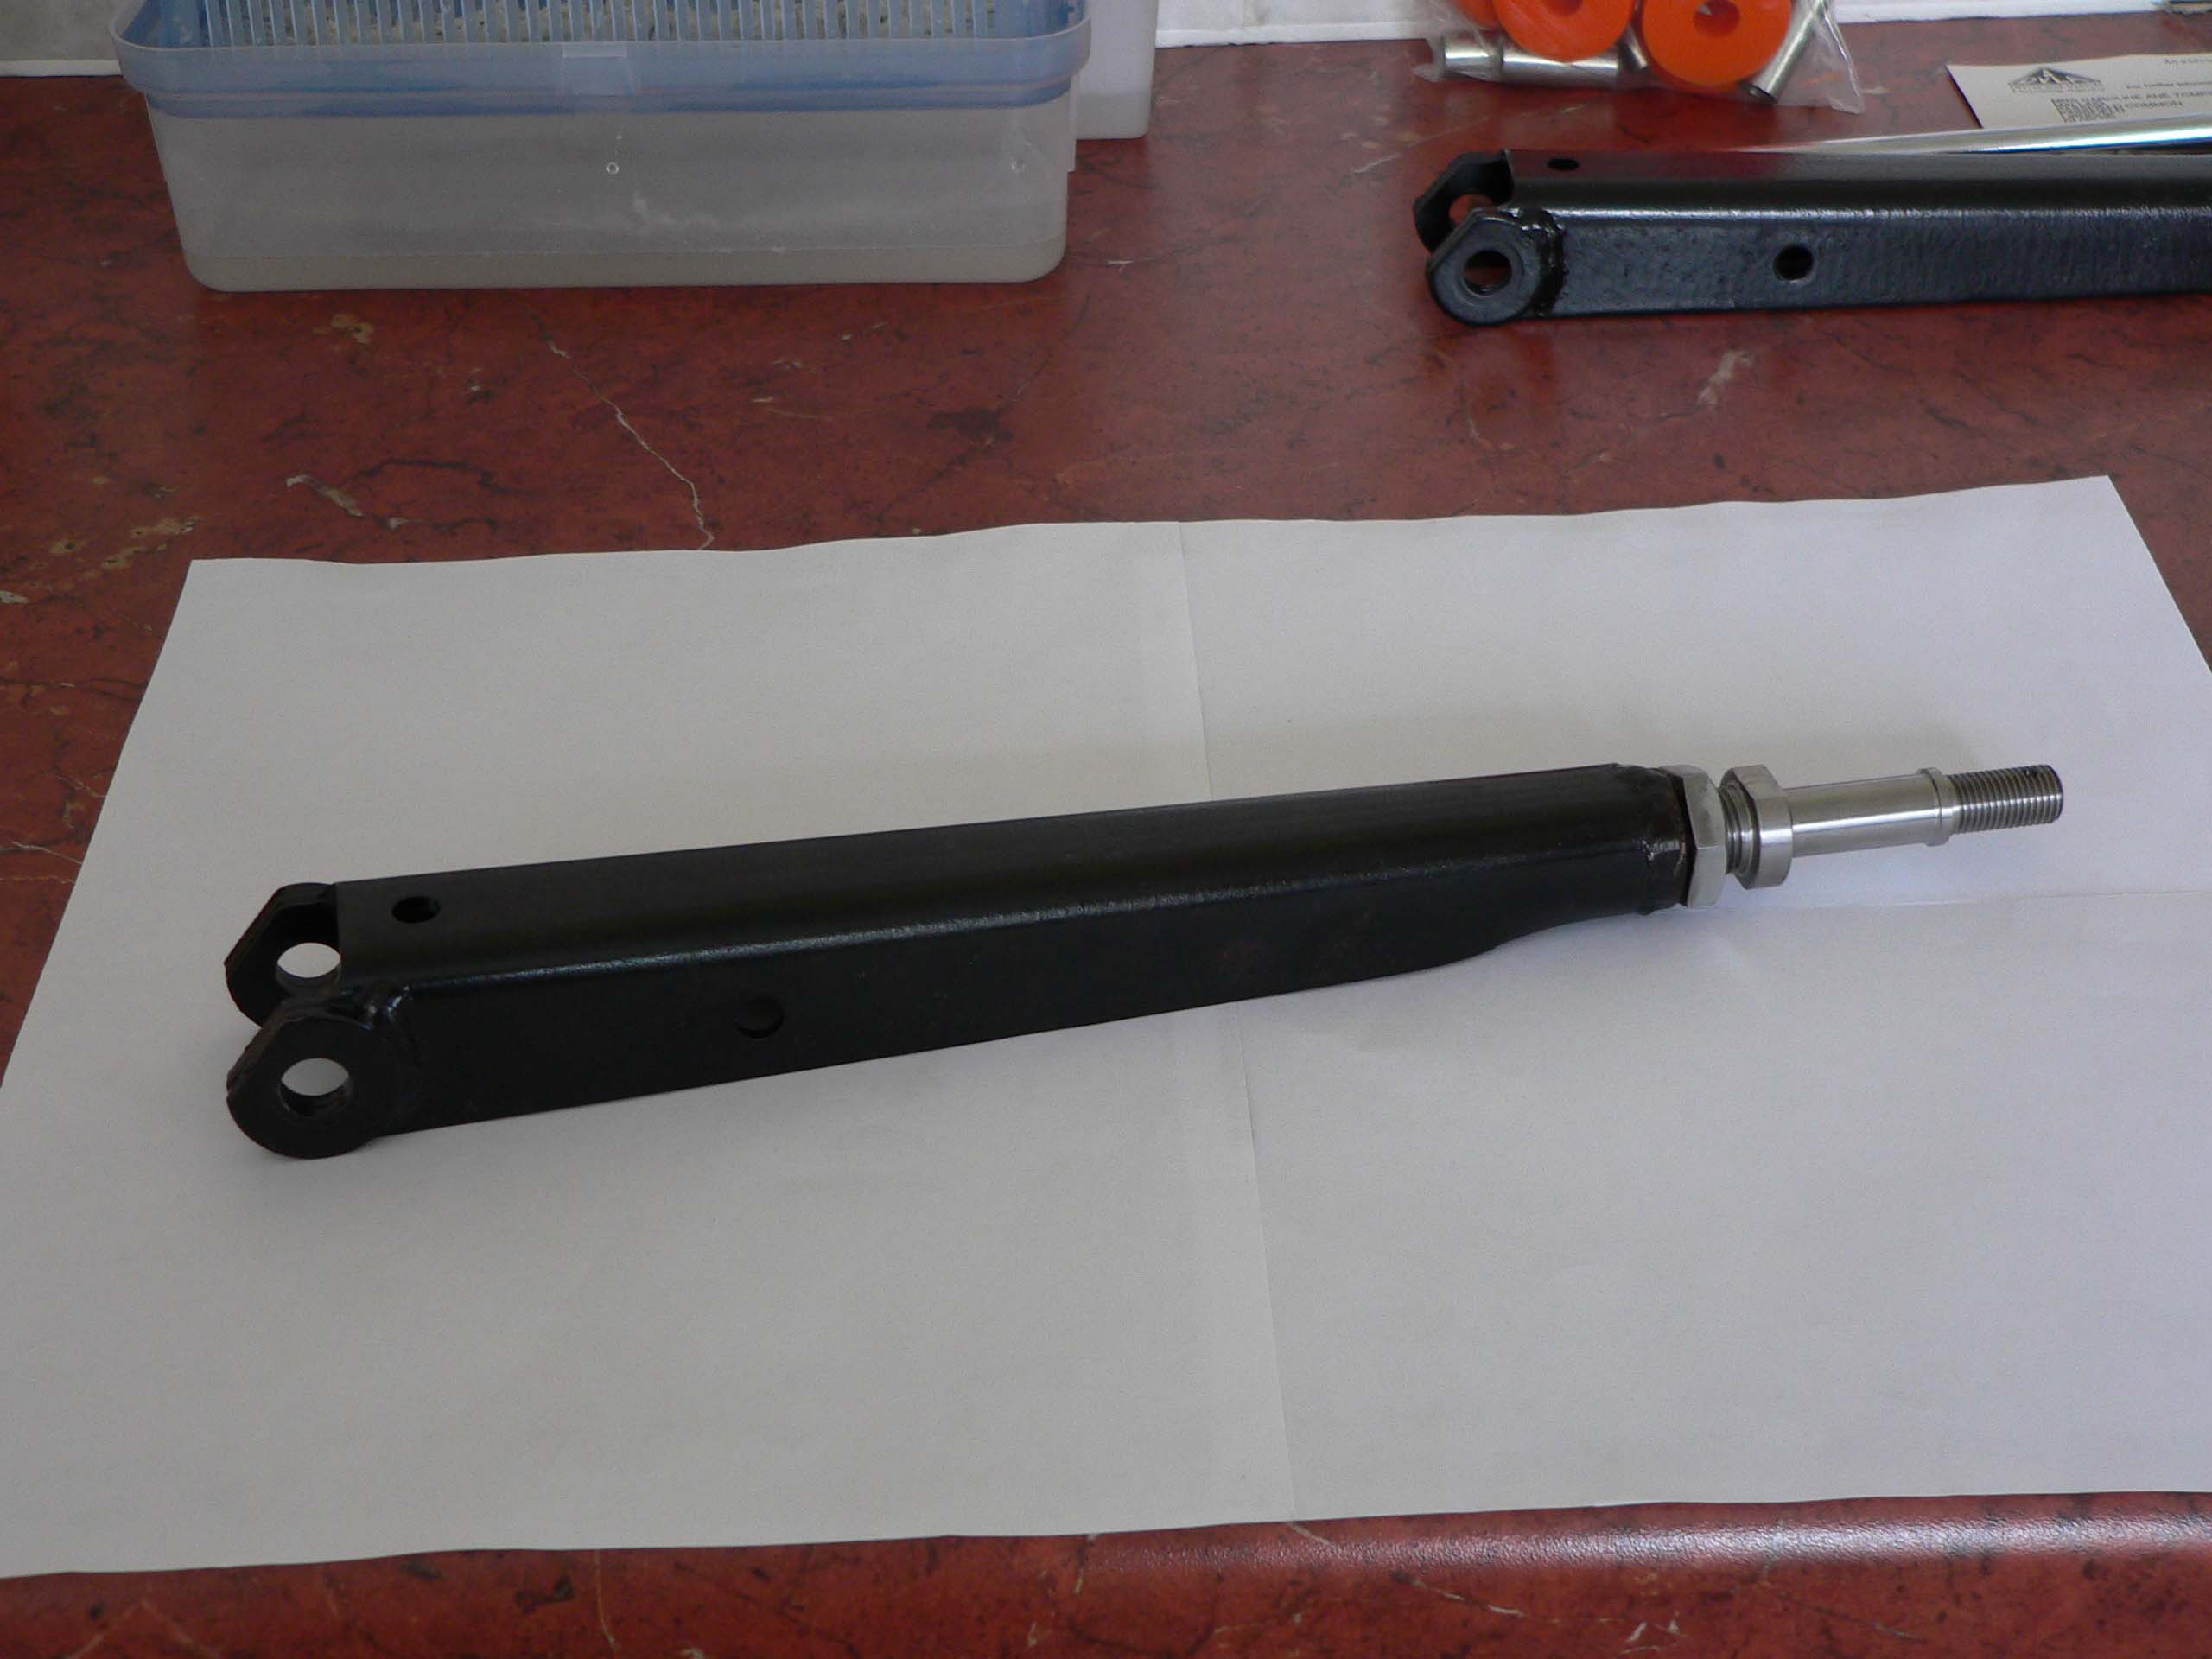
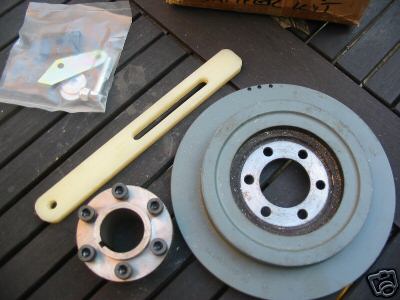
What options are there, and where do you get tuning bits for a Dolomite Sprint? The Dolomite club, keep a look out in the items for sale, and direct from the club itself. Spark plug tubes are available from the club, so are high quality suspension, brake, ignition parts and gaskets. Post a question on the TDC's MotorSport forum, there are a number of people who have years of experience tuning Sprints who look at these pages, but as with everything on the web (this site included) use your common sense as to what will work and where you can get bits. A few guys on there have current race cars, so look out for posts by Mark and Philip Larmour, Rob MacGregor and Ken Clarke. Brakes. You can do your own Sierra brake conversion. Details of this can be found on Smifter's site and Marts site. Or you can get the ST vented disk kit from BKT. SprintParts in OZ can now supply an up-rated brake kit.
The BKT kits are made to order, and have a billet disk, not cast. The disk should last a lot longer than a cast disk. The ST disk kit should only ever use Ferodo pads - or so I was told by one of the chaps when I picked my set up. This kit uses the standard calliper, with a spacer between the two halves. In addition to the brake calliper and disk, you get the ST stub axle and bearings to suit. The stub axle is slightly longer. An interesting thing that Rob MacGregor has done is to get some Ford stub axles made. These mate to the Dolomite vertical link. This lets you use Ford bearings, front hubs brake callipers etc. You will have much more choice over what brakes and wheels to use. The downside is that you will be using Ford PCD on the front, you will have to modify the rear drums and hubs to use the Ford PCD. There are numerous other brake options, one of them is to use two callipers per disk (one in the original position, and one directly opposite, the upright is the same on both sides). This will increase the un-sprung weight, and you will need to change the master cylinder to cope with double the piston area. I have not see this done for a few years. Four pot Princess callipers are also an option, but are getting hard to find. These are now being remade by a number of manufacturers, use these with re-drilled Ford Capri 2.8 vented disks. One of the more reasonably priced callipers from Wildwood or the like are also an option. Suspension. Rimmer's do a number of suspension packages. I have used the Spax and the Gaz adjustable seat set up with up-rated springs. BKT or Jigsaw will be able to supply a number of kits as well. These suppliers also have the poly bush kits, so does Chris Witor. Other shockers are available, and some people use race AVO shocks. Demon Tweeks or the like should have these. It's a relatively simple mod to use standard 2.5" springs and coil over shockers all round, modify the top mounts to take the top of the shocker, and you will have a much greater spring choice. The up-rated Rimmers springs are fine for the odd track day, but for full race you should start by using 500lb springs front 180lb rear - these front springs are far too hard for a road/track car. For a comfortable road car, use the standard springs and good quality shockers. Use new standard springs as the originals will have sagged by an inch or two - a number of people who have fitted lowered springs are surprised that they are not any lower than the standard springs they have removed - this is due to the standard springs sagging over time. Another thing to watch out for is the rear spring top mount - most of these have an angle to position the shocker correctly - look in the workshop manual (or ask on the forum) for the correct position of these - incorrectly positioned top mounts force the shockers into an incorrect position and early failure. Front Anti Roll bar. Fabricate your own. Straight bar with an adjustable pick up onto the lower arm. If you are using the standard bar you can use Montego end mounts as the Dolomite ones are getting very hard to find. Some people use a Sierra anti roll bar. Front Tie bars - Special Tuning used to do a different length set if you can find any - find the ST part number on my ST Page. Rob MacGregor has had some adjustable bars made up. The length of a standard bar from lower link hole to the subframe washer is 255mm and the ST bar's length was 247mm. I've set my tie bars at 247mm.
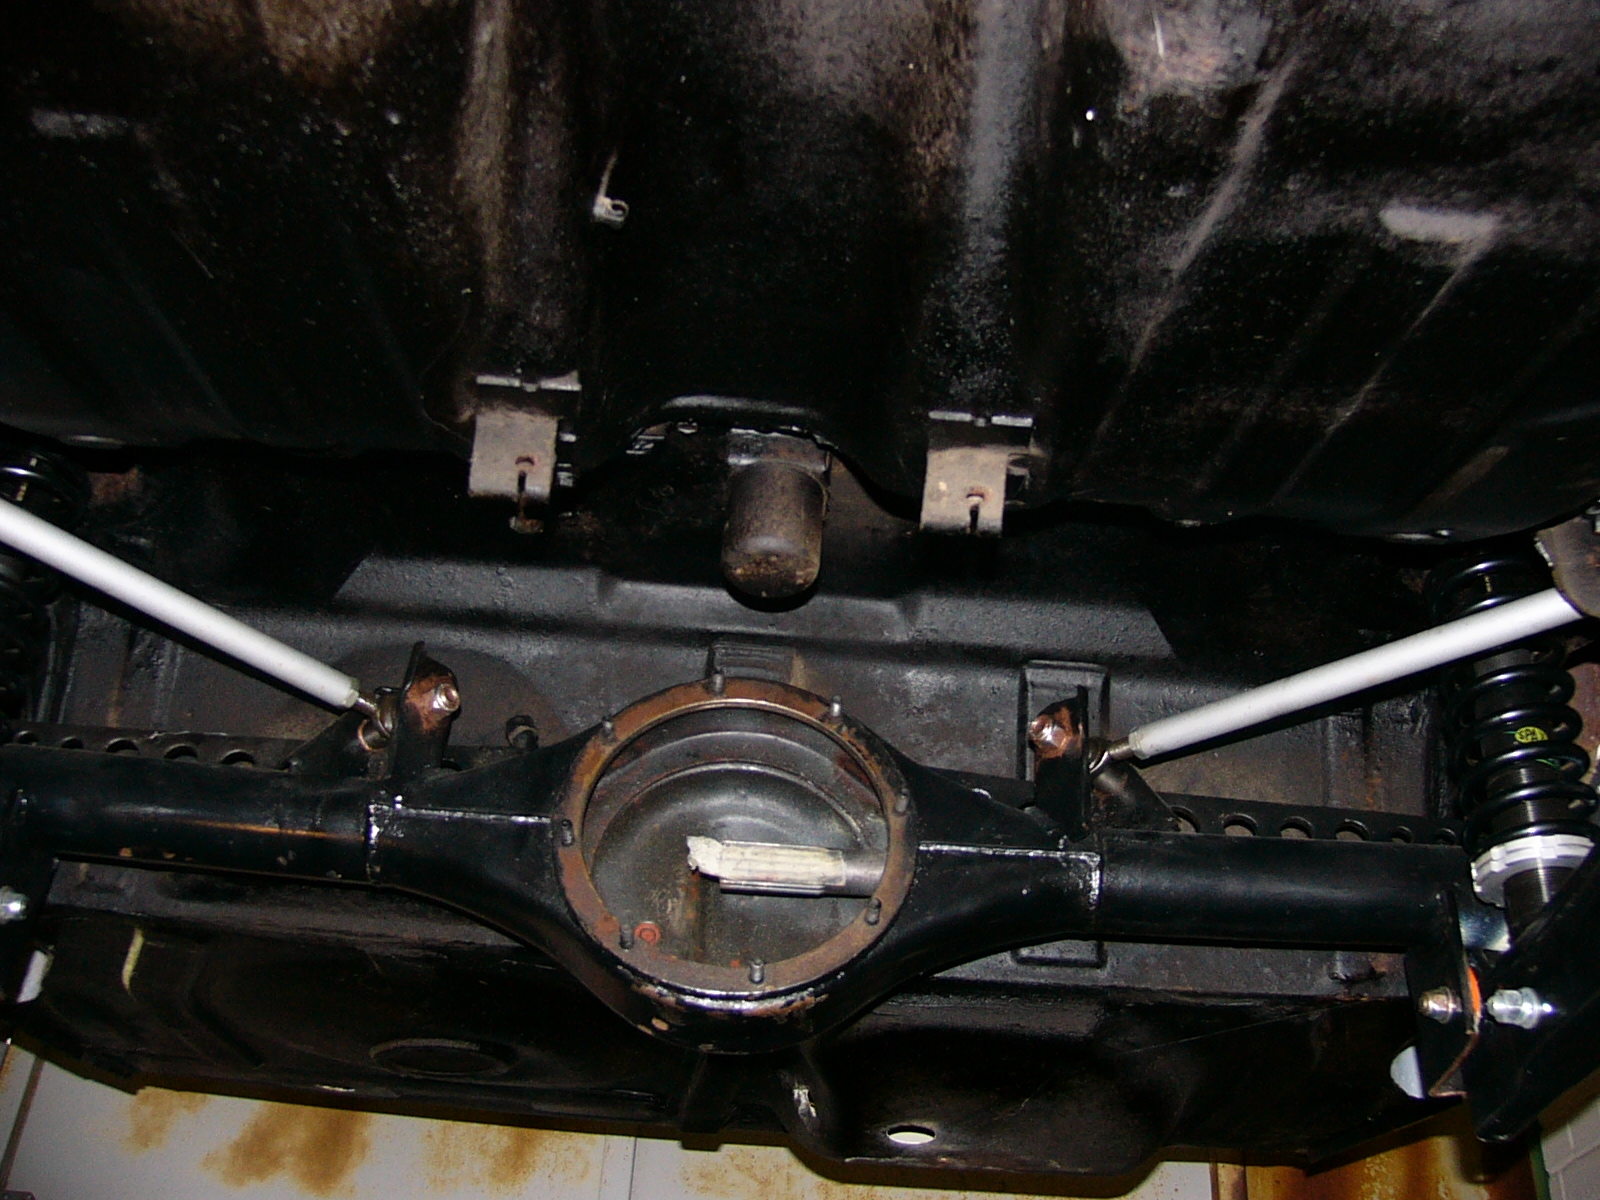
Rear panhard rod. I've seen a number, some going from the back of the rear arm mount on the axle to a fabricated pick up point on the other side of the car. Using something like a Fiesta bar. This may be a reasonable choice for a powerful road car. Or forget the panhard rod and rose joint the two upper arms from the diff to the centre of the body. This is probably a race car only mod, unless you want loads of axle noise in the car.
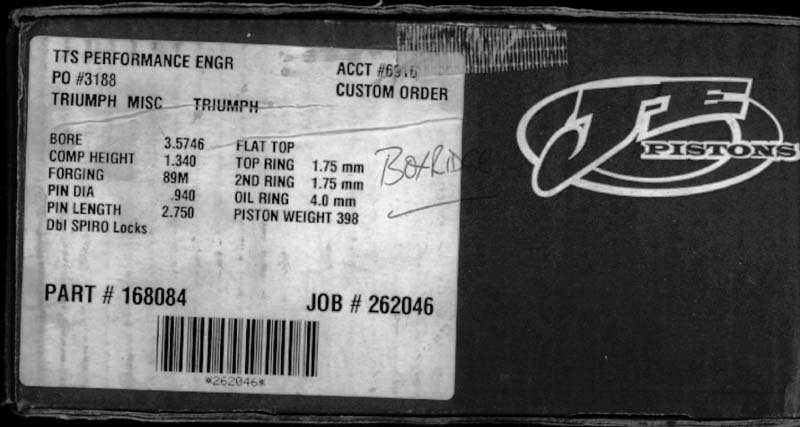
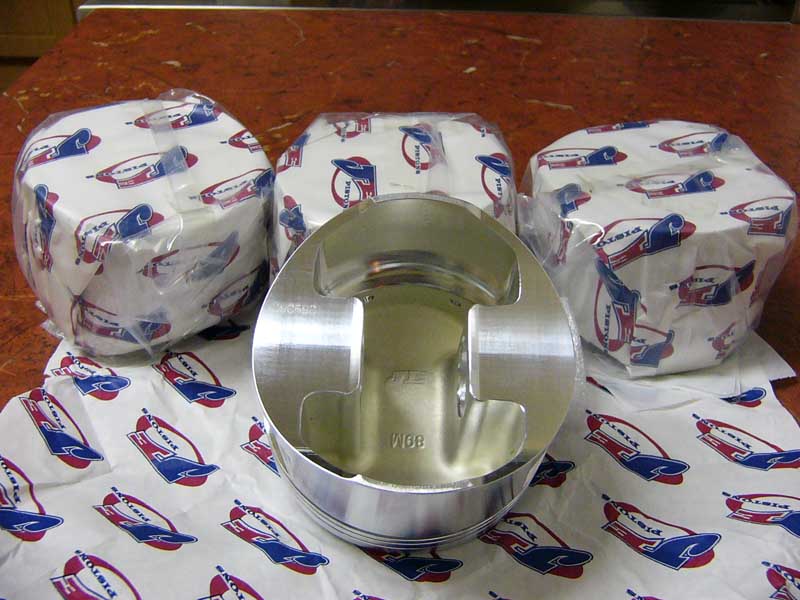
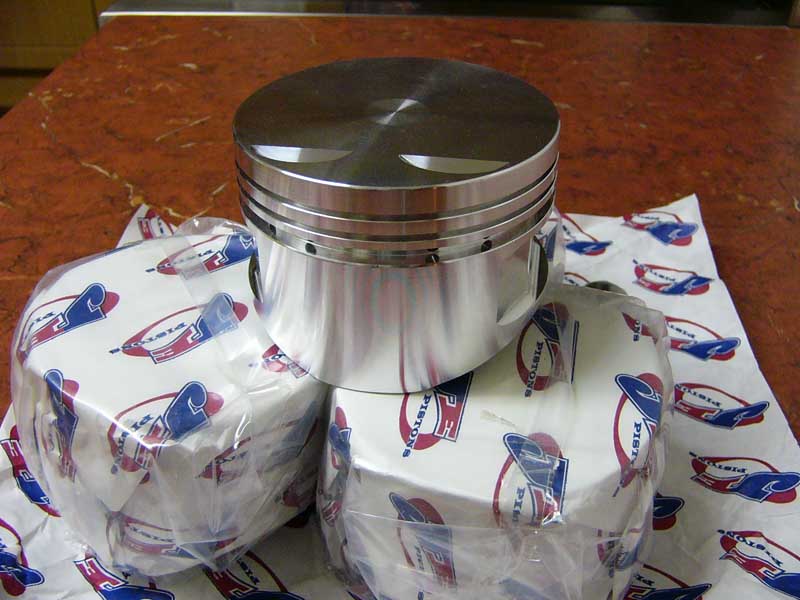
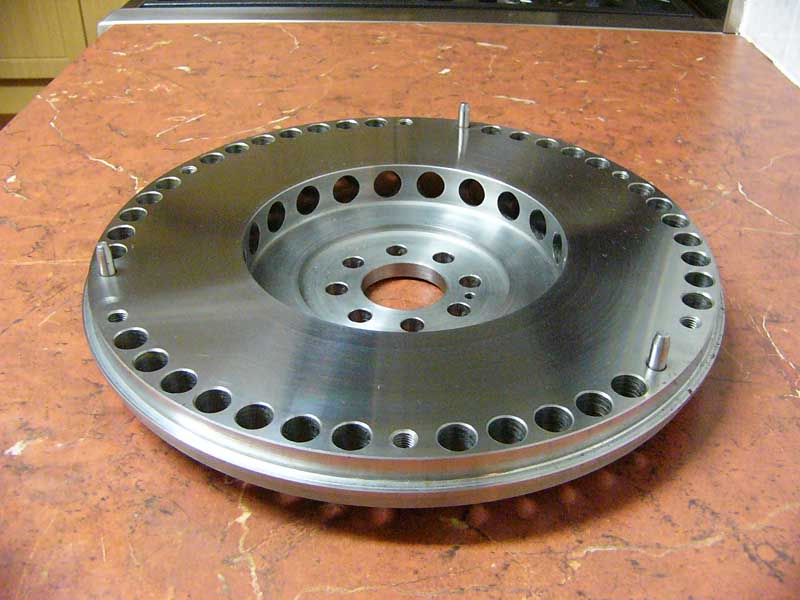
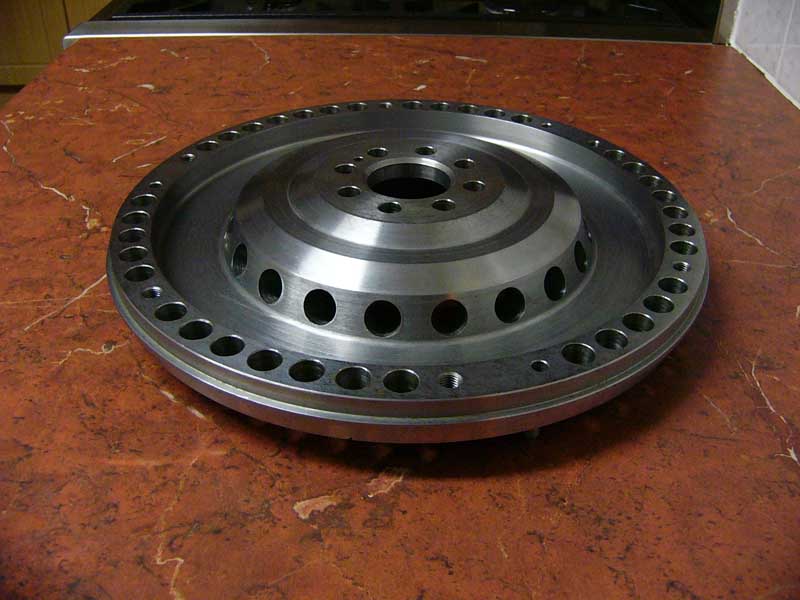
Engine parts. Oil Always use a good quality synthetic oil - like Castrol 10/60 or Mobil 1 5/50 in a new engine (after it's been run in). There are alternatives, good quality is the name of the game and not too thin. I've seen rebuilt engines using 10/40 that hold very good pressure, I would only use this grade on a recently rebuilt engine with a high output oil pump. Pistons TTS Performance in Silverstone can supply JE Forged Pistons (another thing Rob MacGregor gave me the info. for, cheers Rob). BKT can supply Mahle pistons, BCCP can supply Mahle, Cosworth and maybe JE. SprintParts supply cast pistons, but ask them if you want forged, they have had some of their own design made. Out of interest, the forged JE pistons weigh 398 grams, and a quick check of a standard Mahle piston was 690 grams (as someone on the Club Triumph forum said - has one been weighed without the gudgeon pin...oh yeah...I better check that). 1850 and TR7 pistons are different to Sprint pistons, 1850 bore size is obviously smaller, and have a dished crown. TR7 pistons, whilst being the same bore, do not have the two cut outs for the inlet valves in the correct position. Speak to Ken Clarke Motorsport and BCCP for more options. Flywheels Rob also supplied my billet steel flywheel, this one can be lightened further. SprintParts do an alternative with the teeth cut into the flywheel to save you fitting the ring gear.
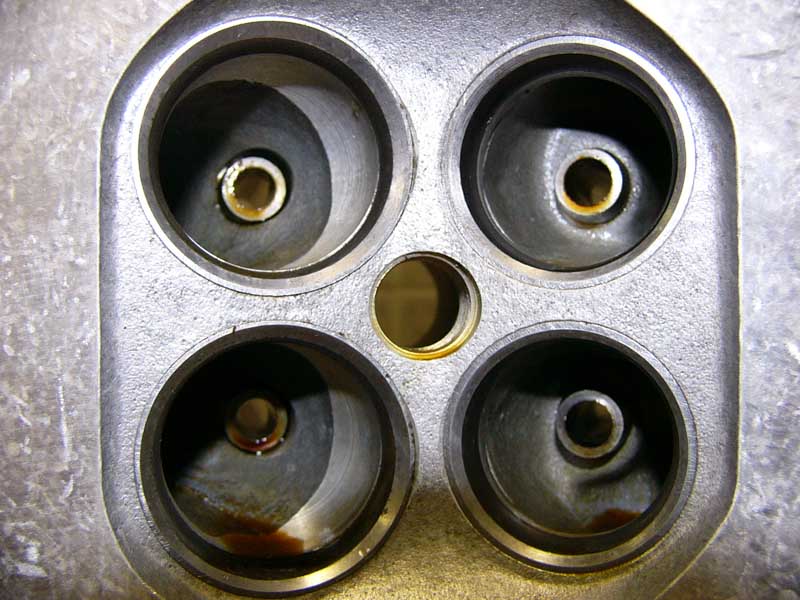
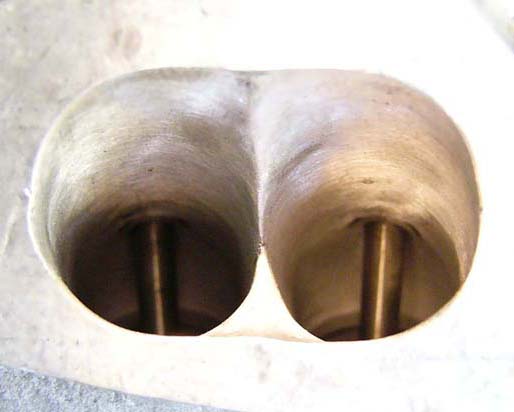
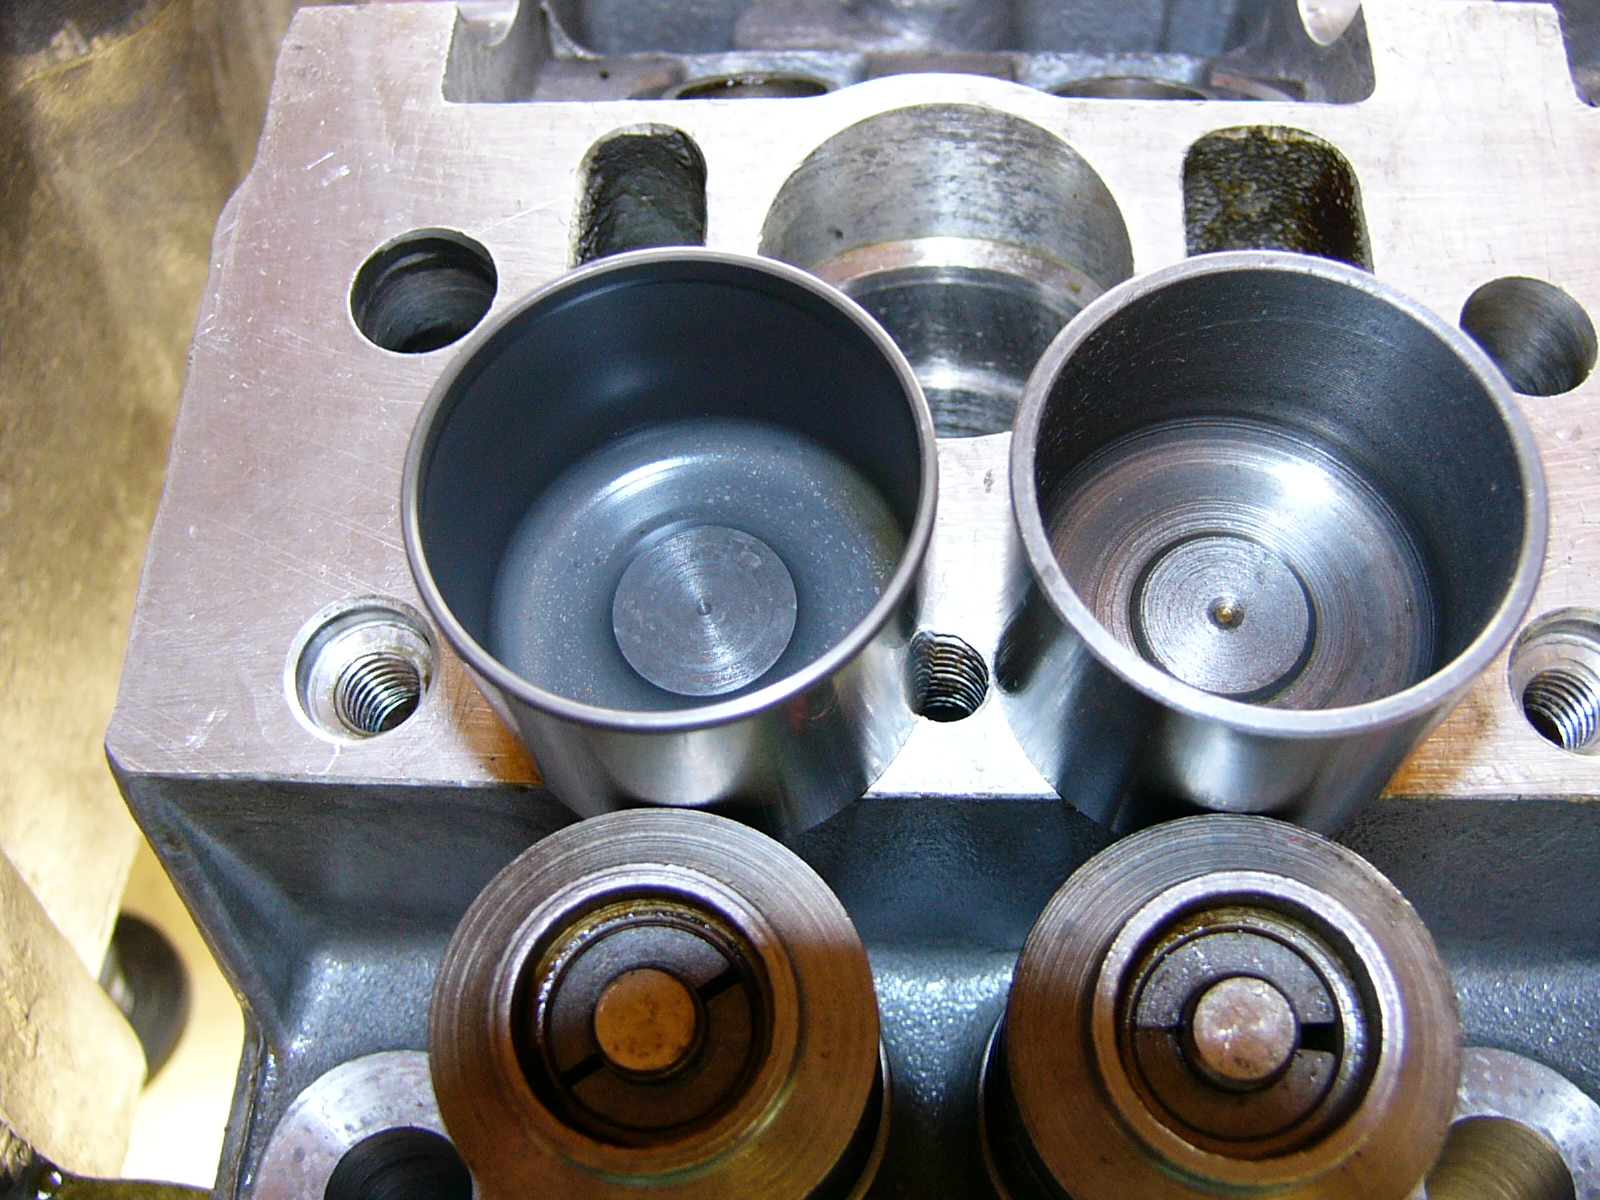
The original flywheel can be lightened. Head New heads are still available from Rimmer's. Yes, they are expensive, and there are plenty of second hand heads available. Rocker shafts are available from Rimmer's. Cam followers are shared with a number of other engines, 1850/TR7/Saab, Rover 2300, 2600 and Jag 2.9, and are readily available. New followers should always be used with a new cam, you can get up-rated followers from Arrow. Rocker arms are getting hard to find, and sadly they do wear, but you can get these reground. Some people have changed the lubrication from splash, to directly onto the cam. This entails drilling the face of the rocker into the existing oil way, and then plugging the end. Another option is to add a spray bar above the cam with a separate oil feed from the transfer housing. I'm not sure how well these work, but they are an option. Head before modifications
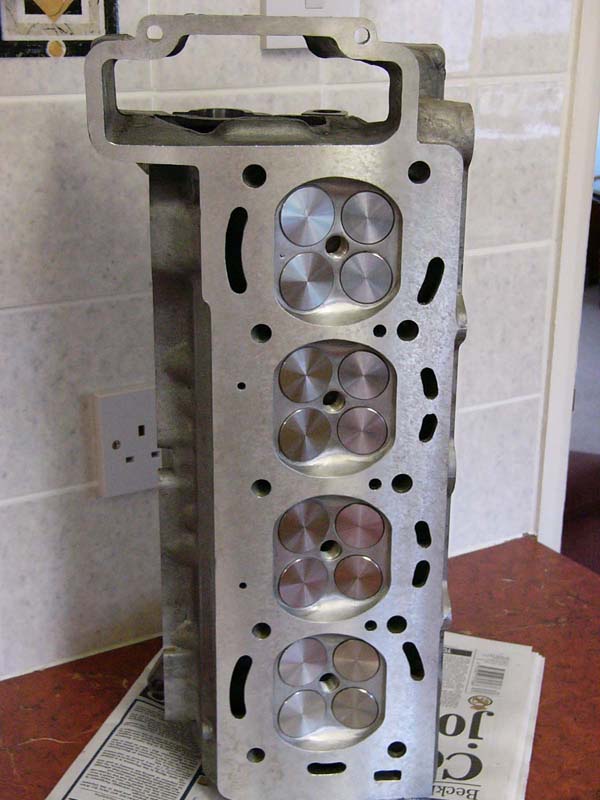
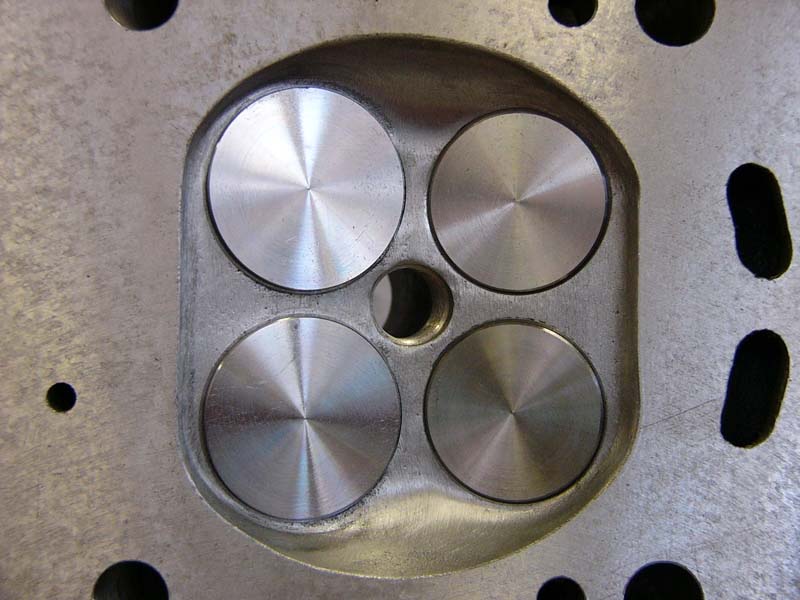
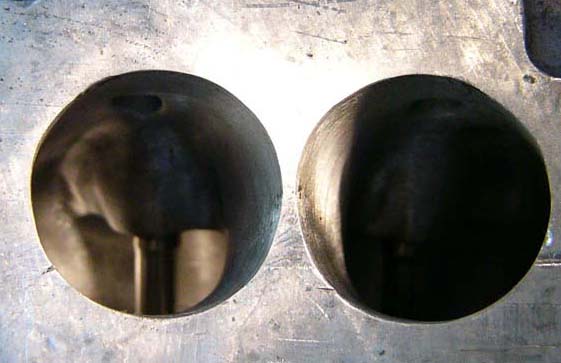
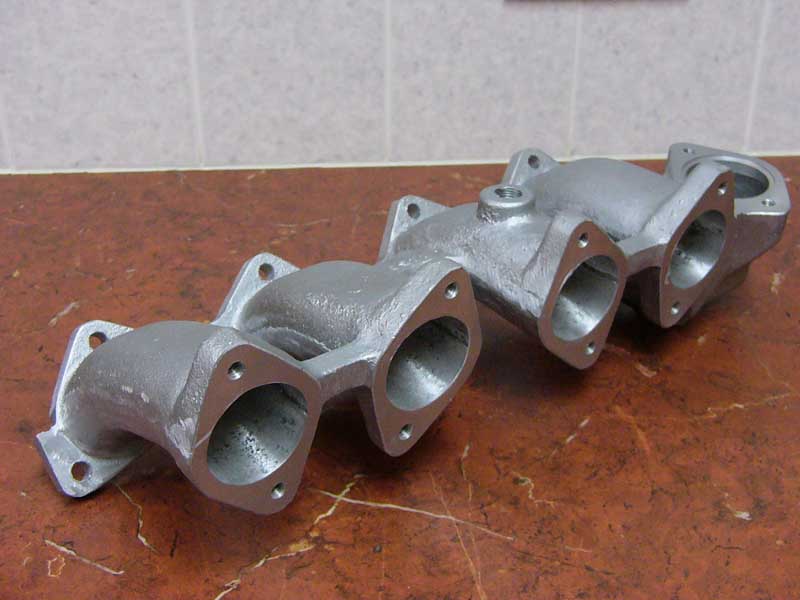
Head modifications Head after TriumphTune Stage III Modifications
My head has been done (if that's the right word) by TriumphTune. I know they sub-contract the work out, and I don't know who actually does the work. Cylinder Head Developments will be happy to work on your head, and BKT can also do the work. Like most 16 valve heads, they do not need a great amount of work to get reasonable power (150ish with a standard carbs and cam). Match the inlet manifold to the gasket and inlet port, use a dowel to make sure the inlet manifold always goes on in the right place will pay dividends. You do not need to match the exhaust port to manifold, see the RAC Homologation page for more details. Phosphor Bronze valve guides are also a good idea. For maximum power you can reduce the seat width to 1mm. For maximum power you want the biggest inlet valves you can fit, the trouble with big valves is making them fit, and then controlling the weight, you have to close the heavier valves. Weight first - if money is no object get some titanium valves made which will give you an instant weight decrease. Making bigger valves fit, Darren Faulkner who owns ALG1K - the 700bhp Cosworth engined Sprint...
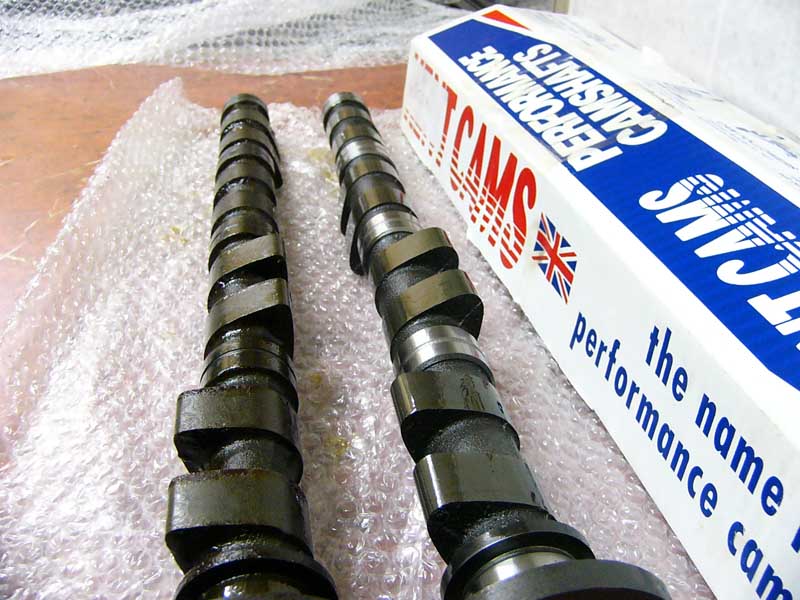
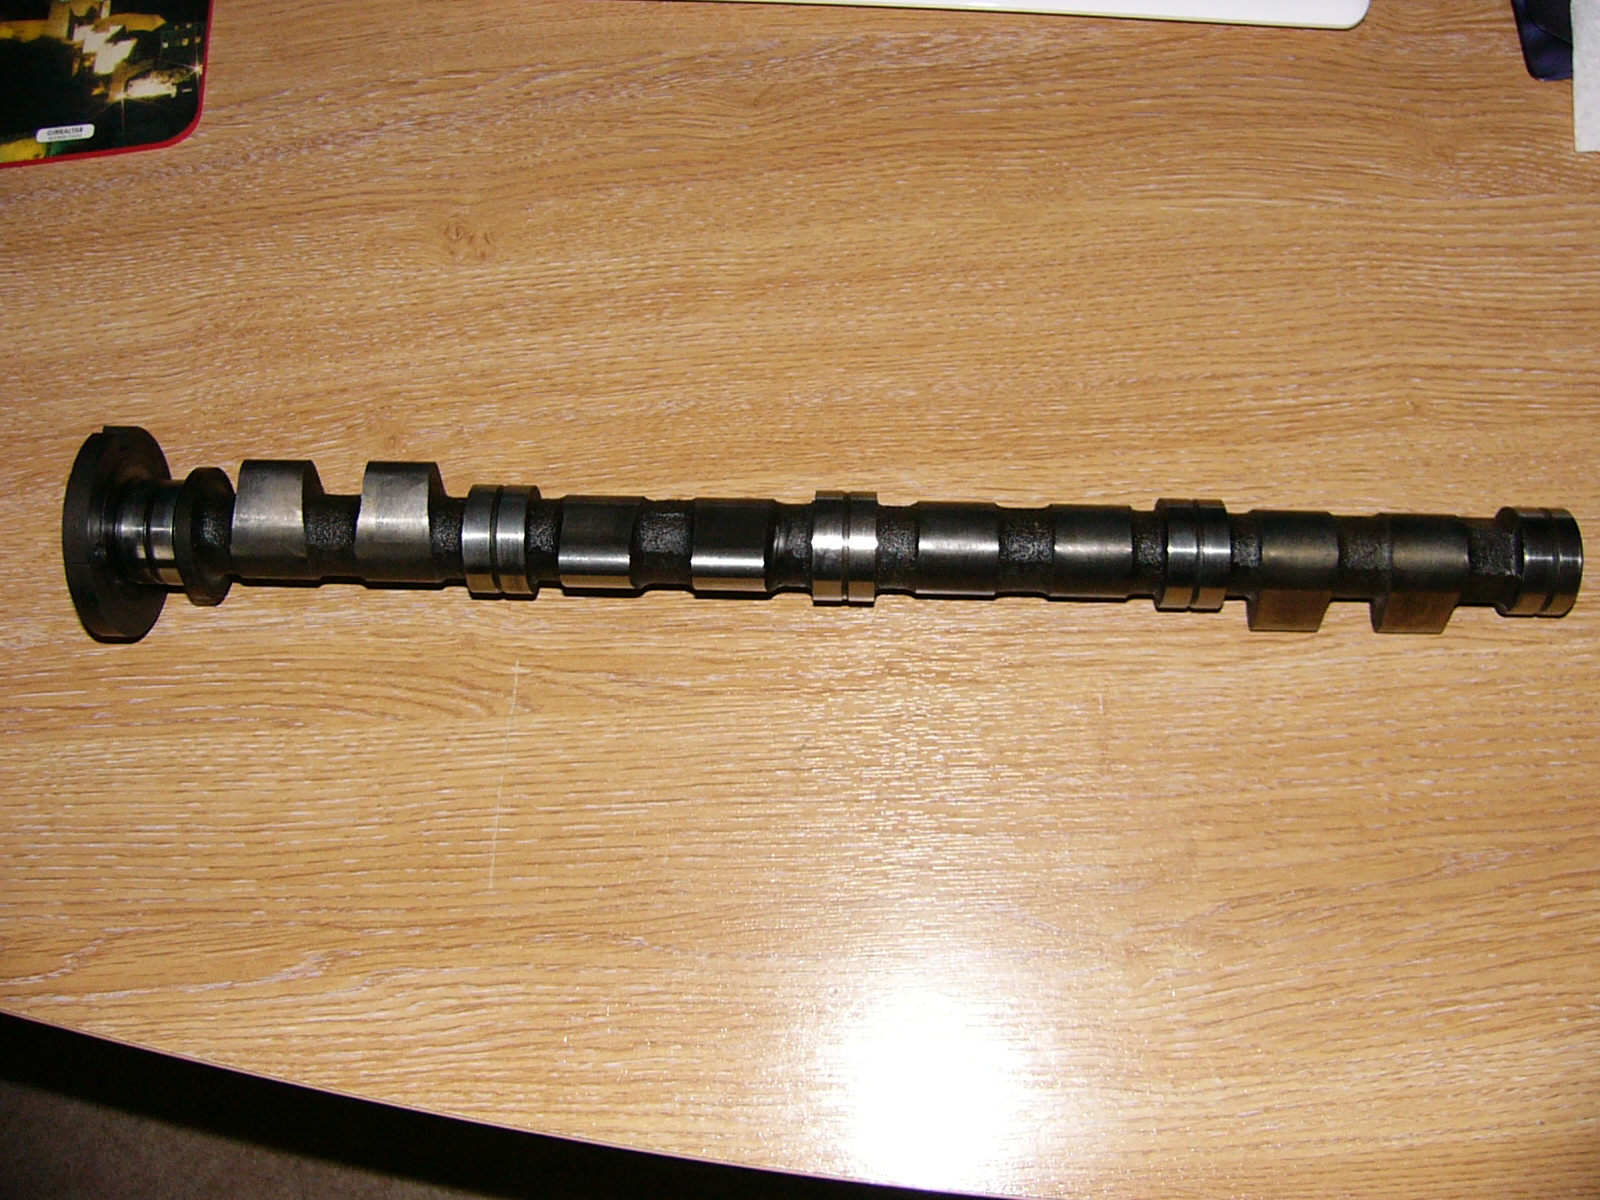
has some ideas on putting bigger valves into a Sprint head. This involves using offset valve guides, machining the head to remove the current guide, and then machining to centre the new valve and valve seat. Welding up where necessary and then machining to fit the new seat. The dutch race guys BCCP use BMW motorbike valves, give them a shout for more details. Don't expect a 200,000 mile second hand head to be a great start for full race mods - check the head carefully before spending lots of time/money on modifications. Things to check are - corrosion, many of these heads have a lot of corrosion around the water ways - this is pretty obvious. Cam bearing caps - any head with the bearing caps missing is as good as scrap. The cam bearings were line bored to match the head. Cam bearings - many engines have had the cam bearings over tightened, check each carefully, any with splayed ends (where the bolts go) have probably been over tightened. Follower bearings - you can get 10thou over sized followers - if the head already has been using these you cannot easily go bigger - check each follower bearing with a new follower. You don't need to worry too much about over skimmed heads, but do check that there is a slight lip between the inlet valves and the head. It will be necessary to use a vernier cam sprocket to get the cam timing correct on a skimmed head. Compression ratio - The combustion chamber volume should be 45cc giving a CR of 10.7-1. With programmable ignition you may be able to go higher than this, just watch the valve to piston clearance. Head studs and bolts. Use new studs and bolts, these are available from Moss (standard), a better alternative is the SprintParts head stud kit, which uses a UNF nut to pull the head down evenly. The guys at BCCP have these as well. Some people have machined the block and head to take larger diameter studs and bolts. You can also machine the head and block to fit dowels - I need to add a link to Hans web site (BCCP chap) who shows very clearly how to machine the head and block to accept dowels. This is done by machining the perpendicular stud holes (the original bolt side) on both head and block to accept a tube dowel - the stud passes through the dowel. Head gaskets. Use Payen gaskets where possible, or the club supplied gaskets. Are double valve springs required? The TriumphTune/Moss single springs have been know to snap, so for any track work I would say yes. For a road car that does not sit a high revs, probably not. I will check the spring rates of a set of TriumphTune double valve springs and publish the results here. Cosworth springs are an alternative. Stainless Steel valves. The standard Sprint exhaust valve, is non magnetic, which is a rule of thumb check to see if it's made from a good(ish) material, the inlet is magnetic, so should not be used anywhere you are looking for more than a 10% power increase. Get those stainless valves for track work. Cams TriumphTune supplied my new STR91. Kent will re-profile your own cam. This may appear strange, as the new STR91 is made by Kent cams. But TriumphTune (Moss) must have paid for their own batch of new cams. So go and get them from TriumphTune. Jigsaw, Piper and others will re-profile your own cam (or get it done). New original cams are available from Rimmers. The photo below, shows an original cam, straight out of a new head, against a new STR91 from Kent cams. You can clearly see the amount of extra metal on the STR91. Re-profiling the original cam to the same profile as the STR91 would greatly reduce the base circle, and you would need longer valves, or very big shims. These Kent cams do not have a timing mark, so you will have to time them using the valves full lift. There are plenty of books out there that can give you an example. A few people have come up with their own cam profile, Jigsaw being one of them. And these profiles promise to give much more power than the STR cams, with a wider power band. Give Jigsaw a ring, as they may be getting a batch of blanks made (they have to order at least 50, so don't be surprised if they have not ordered a batch yet). <== Jigsaw can now supply new STR91's and L1's - and can also make a cam in any profile you want for an extra few notes.
A 7TY1 Cam - which is a reprofile. Triumph Tune TT10104
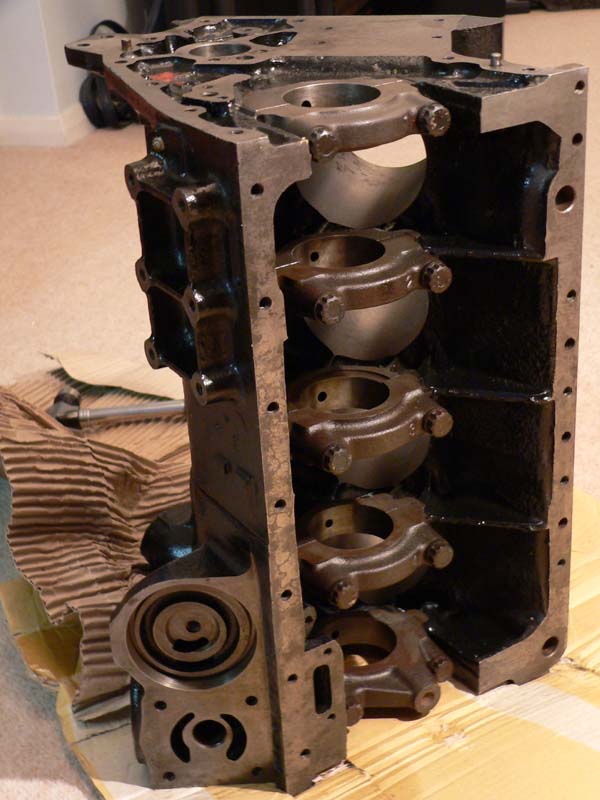
Vernier cam timing wheels are available from Kent cams and SprintParts, these make it very easy to time the cam up, even a standard cam, if the head has been skimmed. Blocks New blocks are available from Rimmers, and it may be worth getting a 1850 new block and boring that out. Always clean the block thoroughly after hand finishing the water inlet and oil ways.
Main bearing caps, these can break. The SprintParts cars run with billet main bearing caps and a saddle. Engine block saddle (or block brace) - A number of people do these, ask SprintParts, BKT, BCCP and Ken Clarke, I have a SprintParts brace - I'll take some pics and put them on here. Rods Standard rods are strong. Get them crack tested, polished and shot peened, then use ARP, TriumphTune or SprintParts up rated bolts. Never use standard bolts on a race car. When using ARP bolts you will find them quite difficult to push in. Get your local engine machine shop to push them in for you, and then to check the caps to rod fit. Pushing in the bolts can slightly deform the big end circle and this can need checking and honing back to size. You will only notice this when the bottom end tightens up after installing these bolts, so check them after installing the ARP bolts. Speak to BCCP or SprintParts for more options on rods. Bearings Vandervell bearings are getting hard to find, You can source mains and thrusts from Moss, big ends you will find with the rocking horse poo, or keep watching eBay (the US site is better than the UK one for TR7/Saab Vandervell bearings). Glacier bearing may be available. TriumphTune, and other specialists will do their best to find high quality bearings. Tip from Ken Clarke : "Ok, I will let you into a little secret. Vandervell bearings are not readily
available but with a little mod to the con rod you can fit late (A+) Cooper S
big end bearings. Just involves machining another locating tag into the rod
correspond with the one on the bearings. These bearings are the same standard
o/d on the crank so any under/oversize will be the same but are about 3mm wider
so spread the load better, last longer etc & are readily available. I have used
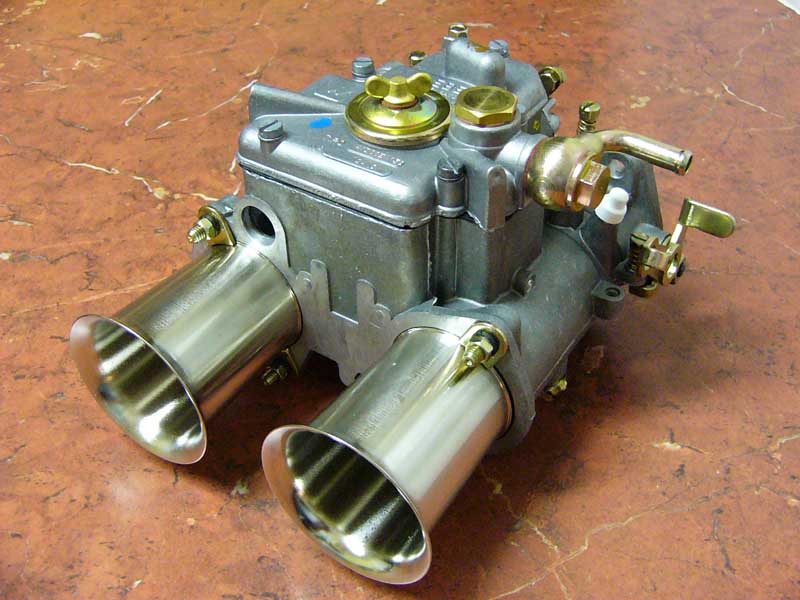
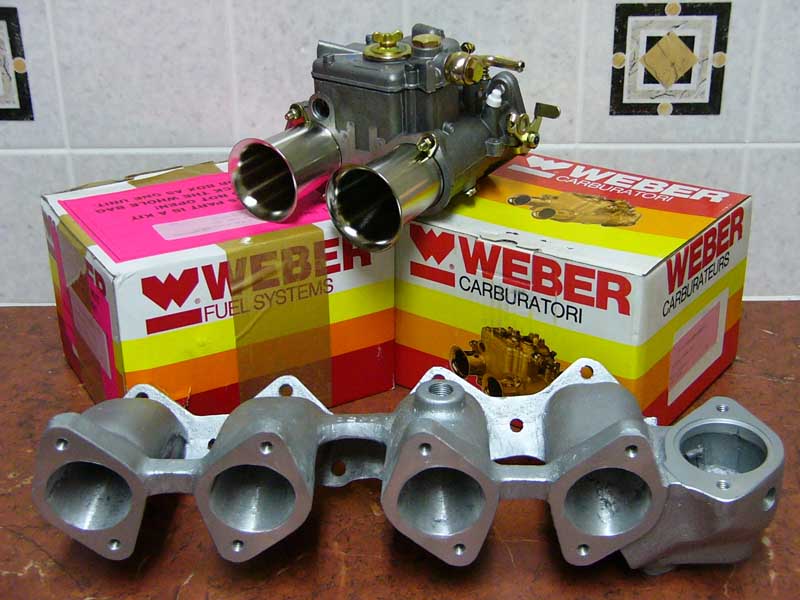
them for many years on all my race engines. Do not tell anyone else. " Oil pumps. Rimmers and TriumphTune supply up-rated oil pumps, or up-rated relief valve springs (even these are getting hard to find) so you can up-rate your own. Don't try this on an already worn pump. Use a new pump and check it before fitting. The up rated pump may be a Saab pump, but more than likely just a different spring. With the spring becoming difficult to find you may have to pack the existing spring, provided it's within the tolerance (check the workshop manual for the length). Oil Coolers. What temperature does your oil run at the moment. Fit a gauge to find out. Fit a cooler if your oil temperature regularly goes above 120 degrees c. For most road cars this will not be necessary. TriumphTune used to supply a 5/8" oil cooler kit, but does not seem to be able to supply it at the moment (made to order only, and takes ages, but a good bit of kit). Get the 1/2" kit from Mocal, Rimmers or TriumphTune. Sump Another option to keep the oil cool, is to increase the sump capacity, see the TriumphTune manual for examples. Or fit a BroadSpeed baffled sump, BKT may be able to supply one. You wont have this problem if you are using a dry sump system. Dry sumping may give you a fair power increase as well, as the crank does not have to turn through the oil splash. A few dry sump plates can be found off the F3 engines, and other race Dolomites, but it's probably easier to make your own. Carbs Get your SU's refurbished by Burlen Fuel systems. Weber's and manifolds can be sourced from TriumphTune or direct from WebCon. There are plenty of suppliers out there. Use the TriumphTune manual for base jets and chokes. The standard SU's can breath pretty well, and 2" SU's are an easy upgrade, a full set-up for about the price of one Weber!
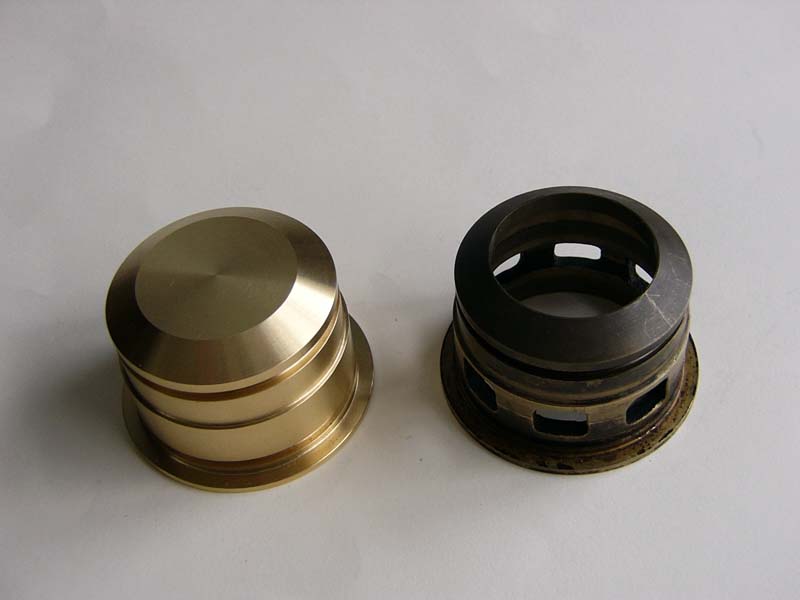
Water pump. With the standard water pump getting expensive, an alternative is to fit a Davies Craig Electric Water Pump from Demon Tweeks, Jigsaw (and others). You will need to block the existing pump cradle off. The bottom hole needs to be blocked to keep oil in the jackshaft hosing, and the top hole needs to be blocked to keep water in the water jacket. I have got a plug made with 'o' rings that sits in place of the existing cradle. Contact the club for details. You can silver solder a washer top and bottom of you pump cradle, or grind the gears and impellor vanes off a normal pump. With the EWP in place you can remove the gears from the jackshaft (and whilst the jackshaft is in the lathe you may as well remove the petrol pump cam if your using a electric pump).
Water circuit. (I'm sure someone must have covered this somewhere else, I should have a look!) The water pump picks water up from the bottom of the radiator, pushes water into the block, which flows around the cylinders. If you have a head gasket handy you will notice that water does not flow back into the head around every bore. The gaps in the top of the block around each bore are there to get the sand out after casting. There is a small bleed hole in the gasket which allows air out, and a small amount of water to flow into the head from the water jacket. The main flow gets into the head at the rear of the block. The water then flows through the head, from back to front, and out through the thermostat into the top hose. The water flows through the radiator and back up into the water pump housing. When the thermostat is closed, a transfer pipe allows water to circulate within the engine. This allows water to flow from the thermostat housing to the top of the water pump housing, and through the heater circuit. If you use an electric water pump, you should remove the thermostat. That would leaves a chance that you now have small circuit flowing through this transfer all the time. It's probably best to block this transfer, but then you need a bleed from the top of the original water pump housing to allow any air out, any small bleed will do. Use a transfer pipe with a small hole as per the picture, again contact the club for details.
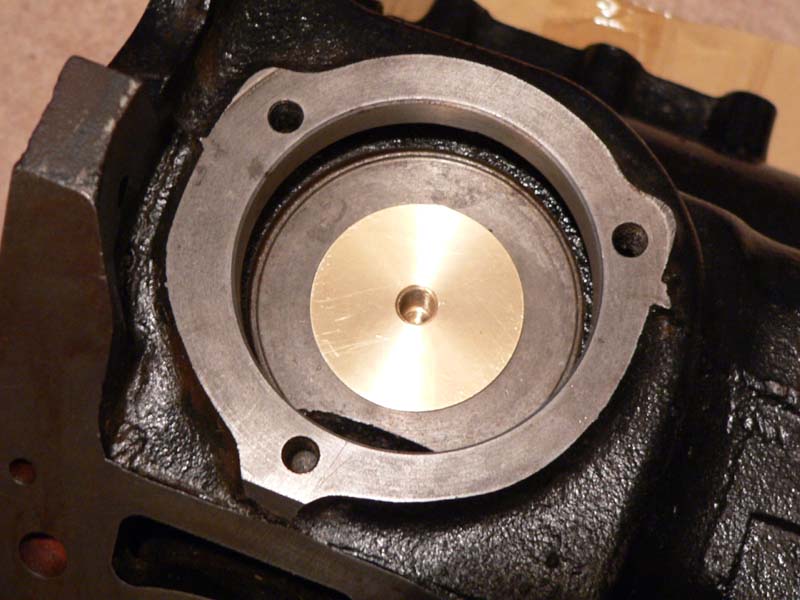
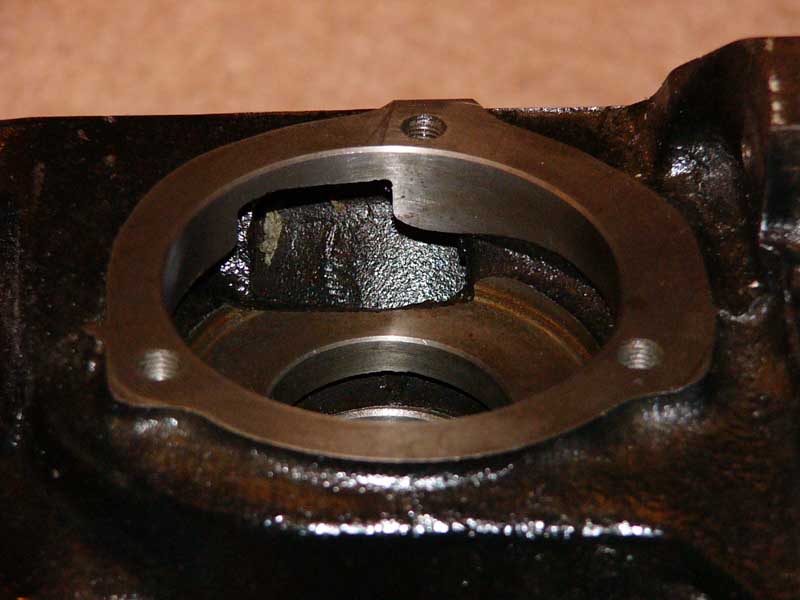
It may be worth noting that the later blocks have a bigger inlet from water pump to block, I'm not sure what "Issue" number this was changed from, but an "Issue 21" block definitely has the large inlet. It's probably worth modifying earlier blocks to have the larger inlet. I have a couple of "Issue 17" blocks that are not quite as big as this picture of an "Issue 21", but not far off it. I also have an "Issue 3" block that has a tiny inlet, well it did before I modified it.
I have a large core radiator, BKT can supply those, and an alloy one from SprintParts. There are a number of UK suppliers for alloy rads. Oil Circuit.
Oil circulation is a bit
easier to work out (from memory). The pump picks up from the sump, and pushes
oil through the filter, from the outside of the filter to the middle. Then
from the middle of the filter into the alloy transfer housing and then up into
the main oil gallery.
The main oil gallery
runs directly above the main bearings, it has a short bolt as bung at the rear
of the engine, which I think is always visible even with the back plate still
on.
The front of the main
oil gallery is blocked by the jackshaft keep plate, with both ends removed you
can easily clean it.
The rear of the gallery
feeds the distributor, and rear jackshaft bearing.
Oil from the main
gallery is metered by the front jackshaft bearing, and from there distributed
to the timing chain tensioner, and up to the head. If you look at the front
jackshaft journal on the shaft itself, you will notice one of two flats, its
these flats that meter the amount of oil going to the head.
By metered I mean the head receives its oil supply in pulses, when the oil way to the head is blocked by the jackshaft, oil pressure can build up in the main oil gallery - this means the mains are always receiving a good oil supply.
The oil way to the head
runs up past the first head stud.
The first cam bearing
cap, then passes oil to the rocker shaft, and hence the rest of the cam
bearings and rockers via drillings in the rocker shaft and rockers.
Gearbox. The standard Sprint box is quite strong, and there are a number of experts out there who can re-condition your existing box and overdrive unit. There are also a couple of gear ratio options. ST did a close ration kit, which you can occasionally get hold of, and there is also a wide ratio gear set that makes 2 and 3rd overdrive more usable. See SprintParts, Chris Witor or BKT for these gear kits. An attractive option is to use a 5 speed gearbox straight out of a TR7. You do not need the alloy spacer between engine and gearbox, and will need the TR's clutch and release mechanism. The prop shaft will need to be altered. This has been done to a number of Sprints, and does sound a reasonable option. Axle & LSD. You cannot get a new Power Lok diff. as used in the production cars. So - the choice is second hand only. And they don't come up that often. BKT, Quillers, Jigsaw etc. may have one, but don't hold your breath. Rimmers and Chris Witor will supply a new Quaife LSD. And Rimmers also do the clutch kit for the PowerLok. A few owners are putting different axles in. SprintParts can supply a new Clutch type LSD. Crankshaft Dampers. Special Tuning used to supply a Freudenberg Damper kit, these occasionally come up for sale, but your best bet is to get one from SprintParts or give me a shout. These kits use a BMW damper with an adaptor to hold it on the Sprint's crank.
You can get the adaptor from SprintParts and get a BMW damper from FritzsBitz. You need an M20 engine damper, and have a choice of a plain or toothed damper - the toothed damper is a 60/2 wheel. Engine balancing, and machining. Get the whole rotating assembly balanced, clutch cover, flywheel, crank and front pulley. Balance each rod and piston. This won't give you any more power, but will make sure the engine stays together longer. Vibration Free will do your machining and balancing. The bores should be machined and honed in line with the piston manufacturers recommendation. Gap the rings to suit your application. Bolting all your bits together. Using a clean bottoming tap of the correct size, clean all threads, buff bolts to remove any debris, and remove any top threads that are pulling clear of the deck (not normally a problem on Dolly lumps). Using a clean half round file, or round file, take the sharp edges off all corners and bearing case and cap edges. And any sharp flashing edges, also check for any flashing that is blocking the oil return holes. Taking the sharp edges off just saves you from cutting yourself whilst working. Clean any machining debris from everywhere. Remove the core plugs and clean the oil ways, then clean them again. Use a steam or pressure washer, and immediately use a high pressure air hose to dry the water off, a light covering of wd40 is ok as a bit of protection. Putting the block on an engine stand and wheeling it about makes life much easier. If using a standard water pump and an old block, change the water pump bearing in the block - this can be fiddly, but better than the pump running out of true and destroying its teeth. Start in a clean clear environment. Ensure every part is spotless, and that any tool you are going to use, and your work top is spotless. Use protective gloves. Jackshaft - make sure you time up the jackshaft correctly - this makes timing the dizzy easier, and also means the oil feed is as BL intended - the front jackshaft bearing meters the oil feed to the head - you will note that there is a flat on the front journal, this is the oil metering. Thrust bearings - use a dab of grease on the back of the thrust washers to hold them against the block when inserting the crank - and the two slots on the washers face the crank - I've taken recently rebuilt engines apart that have incorrectly installed thrust washers (reversed), the heat build up has melted the thrust washers! Use a BL workshop manual, and rotate the engine after every single part is fitted. That way you can easily see and/or feel if there is anything amiss. Insert one piston, torque it up, turn the engine over a few times, next piston etc. Use an accurate torque wrench. Torque fixings up in steps, if a bolt needs tightening to 45lb/ft, torque to 15, then 25, then 45. Making sure the threads are clean, and the bolts have been buffed will make readings much more accurate. When tightening big ends, insert a selection of feeler gauges between the big end cap and the crank - this helps prevent bruising the new big ends.
|
||||||||||||||||||||||||||||||
This site was last updated 21-01-13